



Description
※The model is applicable:
FORD RANGER T7 T8 2015-2022 DOUBLE CAB
※ Compatible With:
◾ FORD RANGER WILDTRAK 2015-2022
◾ FORD RANGER LIMITED 2015-2022
◾ FORD RANGER XL 2015-2022
◾ FORD RANGER XLT 2015-2022
◾ FORD RANGER XLS 2015-2022

⚠ NOT Compatible with:
◾ NOT Compatible with US version of the Ford Ranger series
❓ If unsure, contact us and send a photo of your car. We will serve and assist you.
※Introduction of products:
▶ STYLE: Sleek 4″/5″ Fender Flares
▶ Color: Smooth Matte Black
▶ Material: Automotive-Grade ABS Plastic
▶ Package Contents/Number of Item(s):
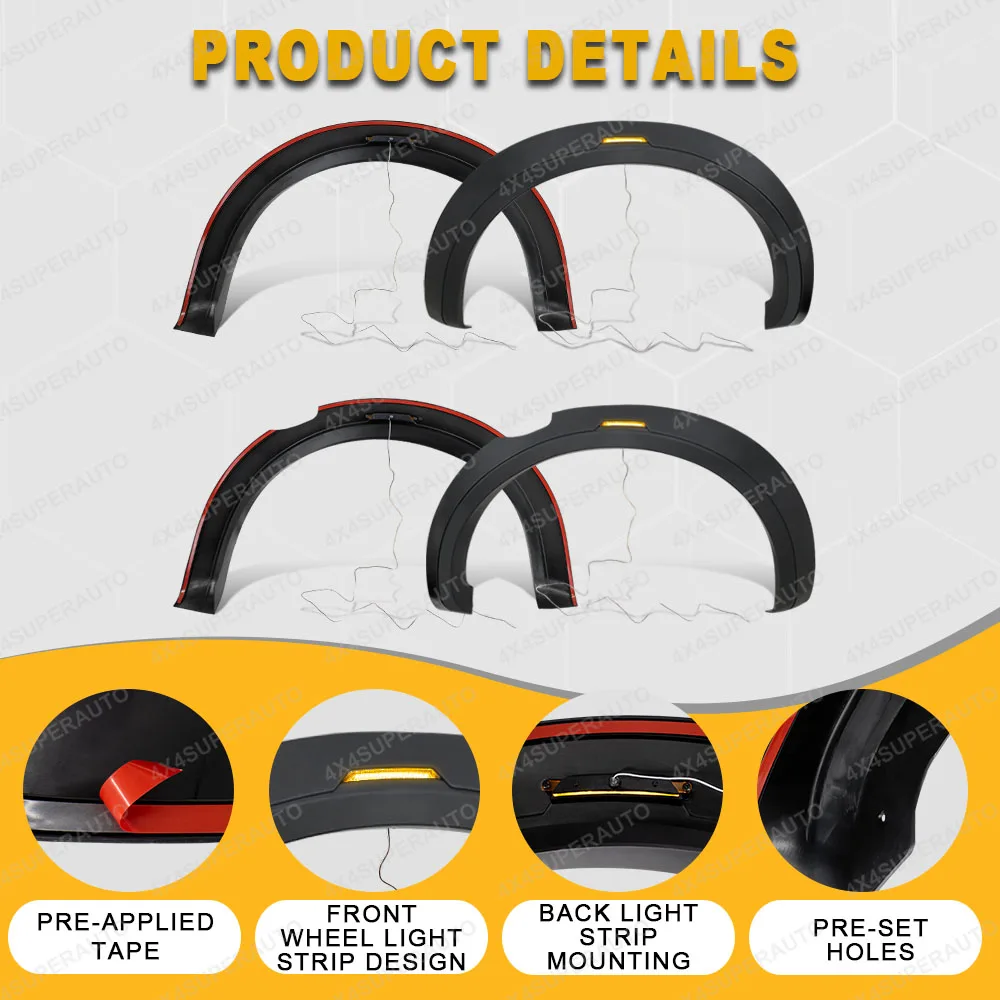
Total 6PCS:
1x Pair of Front Bumper Flares
1x Pair of Front Guard Flares
1x Pair of Rear Guard Flares
TYPE 1-4 INCH (NO PARKING SENSOR)
TYPE 2-4 INCH (WITH PARKING SENSOR)
TYPE 3-5 INCH (NO PARKING SENSOR)
TYPE 4-LED 5 INCH (NO PARKING SENSOR)
TYPE 5-5 INCH (WITH PARKING SENSOR)
TYPE 6-LED 5 INCH (WITH PARKING SENSOR)
##Please purchase as needed. The delivery content is subject to the product you purchased.##
※Commodity features:
PERFECT FIT ▶ Designed for FORD RANGER 2015-2022.
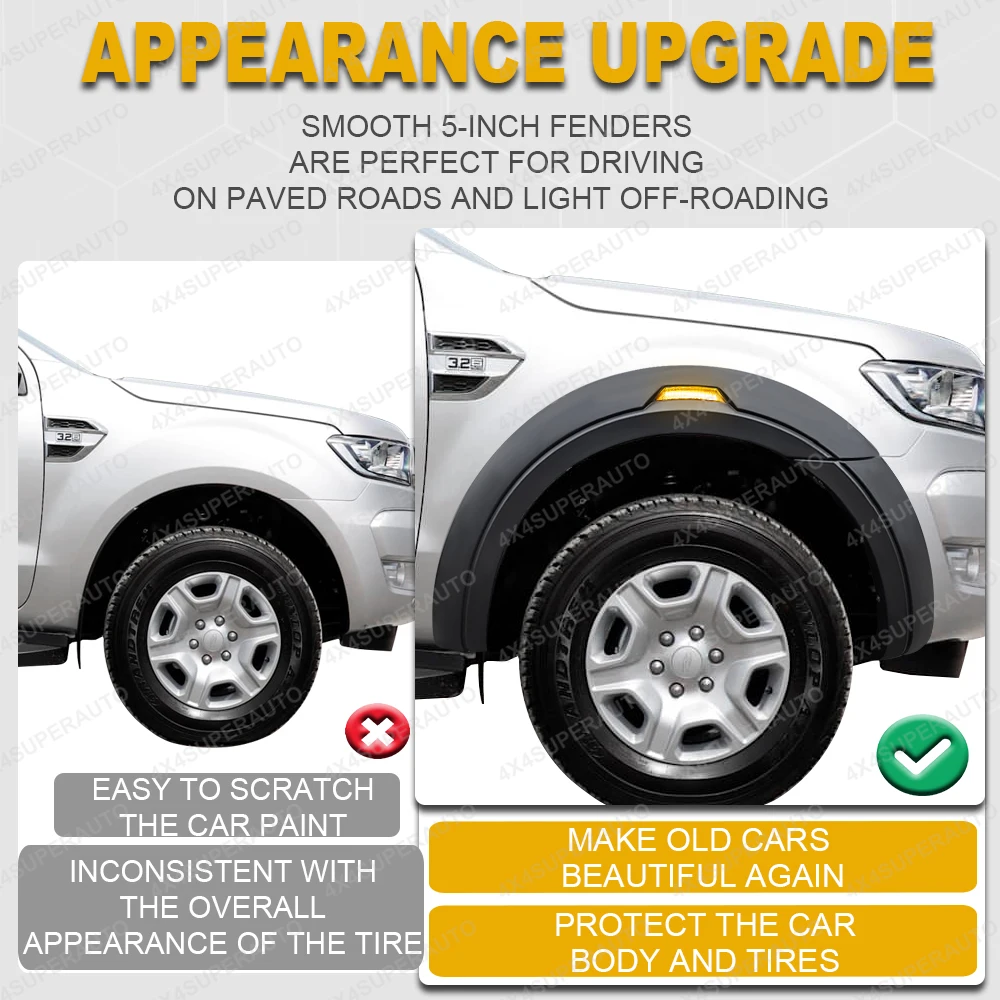
PAINTABLE FINISH ▶ Available in a sleek matt black finish, the glossy finish is paintable.
EASY INSTALLATION ▶ No drilling required. Paint-friendly, hassle-free fitment. Tested installation time: 1-2 hours.
MATERIAL ▶ Made of automotive-grade ABS.
REINFORCED PACKAGING ▶ Safe double-layer packaging ensures damage-free delivery.
FEATURES ▶
▫ DURABLE AND STURDY: Withstands various weather conditions and daily wear, featuring a UV-resistant coating to prevent fading and chalking.
▫ PREMIUM MATERIALS: Reinforced structure protects the truck body and wheel wells, effectively blocking debris and stone chips.
▫ SECURE DESIGN: Bolts reinforced into factory holes on the wheel well top prevent detachment.
▫ STYLISH APPEARANCE: Sleek 4/5-inch wheel flares, perfectly suited for both paved roads and light off-road driving.
※Installation:
1️⃣Clean & Heat: Thoroughly clean the installation area. Preheat the adhesive strip with a heat gun for a stronger bond.
2️⃣Align & Partly Stick: Peel back 1-2 inches of tape from both ends. Align the fender’s holes with your vehicle’s original holes and install the clips.
3️⃣Secure & Screw: Peel off the rest of the backing, press firmly, and install the provided screws (but don’t tighten them yet).
4️⃣Final Check & Tighten: Ensure the fender is perfectly aligned and has no gaps with the body. Then, press firmly and tighten all screws completely.
5️⃣ Don’t wash the car within 72 hours. The glue will be cured after 48 hours.
IMPORTANT NOTE:
1.HOLES DON’T MATCH?
YOU MAY NEED TO DRILL NEW HOLES IN THE FENDER.
2.FACTORY MUD FLAPS?
OUR FENDER FLARES DON’T REQUIRE REMOVAL OF THE FACTORY FENDERS; THEY CAN BE INSTALLED DIRECTLY OVER THEM, MAKING THEM VERY CONVENIENT.
3.NEED HELP?
A DETAILED PDF GUIDE IS AVAILABLE. CONTACT OUR SUPPORT TEAM FOR ASSISTANCE.
⚙UPGRADE YOUR RIDE TODAY⚙


##4 INCH WIDEN SIZE##
##5 INCH WIDEN SIZE##
※ Below are some practical scenarios and product pictures:
##The following car models are for reference only, as the same car model may vary slightly in different countries##


TYPE 1-4 INCH (NO PARKING SENSOR)


TYPE 2-4 INCH (WITH PARKING SENSOR)


TYPE 3-5 INCH (NO PARKING SENSOR)


TYPE 4-LED 5 INCH (NO PARKING SENSOR)


TYPE 5-5 INCH (WITH PARKING SENSOR)


TYPE 6-LED 5 INCH (WITH PARKING SENSOR)


※Q&A
Q1: HOW DO I CONFIRM THE YEAR/MAKE/MODEL OF MY VEHICLE?
A1:
Method 1: You can use the vehicle identification number (VIN), which can be found on the insurance card, vehicle title, and sometimes etched on the windshield or door frame. You can use an online VIN decoding tool or website to decode the VIN and find specific information about your vehicle.
Method 2: You can ask the dealer where you bought the vehicle at the time, and he will give you the answer.
Q2: ARE OVERSIZED FENDER FLARES LEGAL IN MY AREA?
A2: Regulations for oversized fender flares vary by location and vehicle type. Always check local laws before purchasing or installing fender flares.
Q3: WHAT SHOULD I DO IF THE FENDER FLARES DON’T SEEM TO FIT MY VEHICLE?
A3:If the fender doesn’t match, first check the embossed code on its back (FL-Front Left, FR-Front Right) to confirm the installation position. If no code is present or the issue persists, contact our technical support team promptly.
Q4: WHAT SHOULD I DO IF THERE’S A GAP BETWEEN THE FENDER AND THE BODY?
A4:First, loosen the screws at the top of the wheel well. Align the marked installation position along the guide lines until the fender lip fits flush against the body without gaps. Then tighten the screws from the top of the wheel well.
Q5: HOW CAN I TELL IF THE FENDER IS INSTALLED CORRECTLY?
A5:
Method 1: A correctly installed fender should have its flared edge flush against the vehicle body. Check for proper alignment.
Method 2: When properly aligned, the bottom edge should meet the vehicle’s fender base, and the front edge should tightly contact the bumper.
Q6: HOW CAN I QUICKLY ACTIVATE THE PRE-APPLIED ADHESIVE TAPE ON THE FENDER’S BACK?
A6:Use a heat gun or hair dryer to warm the adhesive strip for optimal bonding results.
Q7: REGARDING THE PROBLEM THAT THE RESERVED HOLES OF THE FENDER CANNOT BE ALIGNED WITH THE ORIGINAL HOLES
A7:Because screw placement varies across different car models and countries, the pre-drilled holes on the product may not align with the body mounting bolts. Ignore the existing screw holes on the bottom of the product for now. Install the fender to the body. After aligning the fender with the body contour, mark and re-drill the holes to align with the original screw locations. Tighten the screws (remove the fender before installation).
Q8:ADDITIONAL NOTES
A8:When you have received your package, please inspect your product for any manufacturer defects or shipping damage prior to installation. If you notice any damages or defects, please contact us ASAP.


Reviews
There are no reviews yet.